


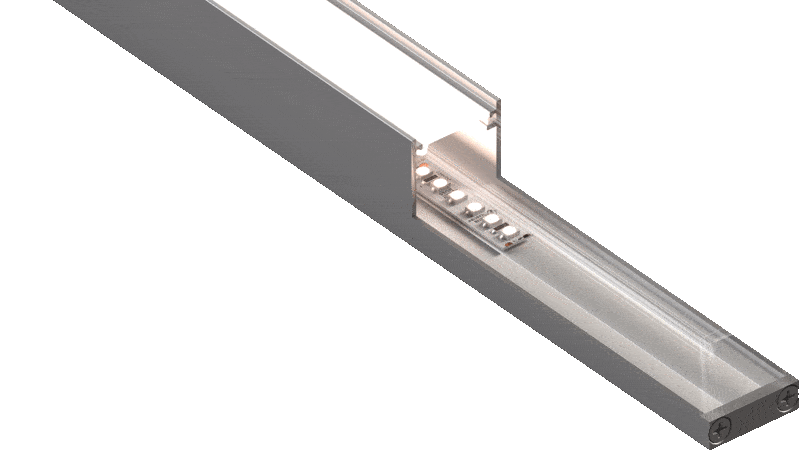

A web application created by LumenTruss for creation of personalized profiles in four simple steps:
![]() Customize profile
Customize profile
![]()
Customize profile
![]() Generate Project
Generate Project
![]()
Generate Project
![]() Send to agent
Send to agent
![]()
Send to agent
![]() Get a quote
Get a quote
![]()
Get a quote
No configuration required.
The application can be used with any operating system and in any web browser. No physical configuration required. For best experience, use the application at the resolution of at least 1200px. Otherwise the experience may be more complex.
Discover the user guide wizard.
When Optilux Generator is accessed for the first time, a user guide wizard activates automatically to guide you through the application. Pay attention to the pop-up windows. They will help you better understand how the generator works.
YOU CAN ALSO SEE BELOW FOR THE STEP-BY-STEP USER GUIDE
Optilux Generator User Guide
1. Create a project with Optilux Generator
1.1. OPEN THE APPLICATION
To access the Optilux Generator click on the application icon above or follow these steps:
- Go to www.lumentruss.com
- Click on the tab Our Apps in the site’s navigation menu (top right)
- Click on the Optilux Generator application icon

1.2. PROJECT NAME
In the text field, type in the name of your project. Generally speaking, your project should have a logical name; but since we are in the process of learning about the app, you may use something like “YourName-My1stProject”.
1.3. GENERAL CHARACTERISTICS
The order in which general characteristics are filled in is predefined: fields become active when the previous ones are completed. In fact, characteristics that you choose have an impact on fields that follow. So, be aware that when you make changes in one of the options of this chain, you are likely to lose the configuration that follows it.
Here are different characteristics to define (we’ll take a closer look at them in following sections):
- Profile model
- Profile color
- Mounting hardware
- CCT (light color temperature)
- Total length of the profile
- Type of electrical feed

1.3.1. Profile Model
Choose a profile model from available options.
1.3.2. Profile Color
Choose a color of the profile by clicking one of the options provided.
Note that the color names in the application correspond to those in the product technical sheet.
1.3.3. Mounting Hardware
Choose installation type by clicking one of the options provided.
Then fill in the required information depending on the installation type that you have chosen.

1.3.4. Color Temperature
Choose color temperature by clicking one of the options provided in the drop-down menu.
Our application Light Rendering Simulator will help you compare different temperatures depending on the time of the day and the type of environment.

1.3.5. Total Length of the Profile
In the text field, indicate the total length of the profile in inches.
- Fractions must be expressed in decimals
- Maximum length is 93.50 inches.

1.3.6. Type of Power Feed
– Click the Power Feed button
– In the pop-up window:
- Select the type of electrical wire from the drop-down menu
- Select one of two options for the wire way position
– Click Close to confirm your choice


1.4. CUSTOMIZED SECTIONS
Now that you have specified general characteristics of the profile, it’s time to customize different sections.
“INSIDE PROFILE SECTION”
Before starting, inspect the table at the top of this section. The indicators in this table will help you to customize and adjust different sections of the profile.
REMAINING LENGTH OF THE PROFILE:
This value corresponds to the profile length left to customize and/or adjust
TOTAL LENGTH BUILT:
This value corresponds to the constructed length of your profile. It includes end caps at the ends of the profile, customized sections, and sections without light source.
VIEWER
Interactive viewer is a diagram that gets updated according to the sections that you customize.
Since we haven’t added any sections yet, the built length is now equal to 2″, because the system automatically adds a blind with minimum length of 1″ at either end of the profile.

1.4.1. Add Section
Here is an algorithm to follow when you want to add a new section:
- Choose a type of light source among available options from the drop-down menu
the two available light sources are Optilux and LED strip
- Then click the button to customize this newly created section.
- In the pop-up window, complete all fields. To do so, choose one option in every drop-down menu. As soon as the fields are completed, click Close to confirm your choice. Your customized section will appear in the viewer.
LUMEN PACKAGE – options for the light source
- type of LED strip
- color temperature
PROFILE OPTION – options for the profile and accessories
- length – choose length among available options. Note that lengths are pre-defined and non-personnalisable to avoid dark spots.
- finish
- shield (for Optilux option) – choose the finish color
- lens (for LED strip) – choose preferred optics
To customize one or multiple other sections, proceed by clicking Add a section and repeat the same steps.
IMPORTANT: application adds automatically a blind of 1″ between two sections.


1.4.2. Clone Section
You can duplicate a section that you previously created and customized. To do so, click the option Clone section between the section title and the drop-down menu.

1.4.3. Change Section Order
Click one of the available options under the section titles to move your section:
- Click Shift to the right to move it one section to the right
- Click Shift to the left to move it one section to the left

1.4.4. Remove Section
To delete a section, click the Remove section button to the left of the section that you wish to delete.

1.4.5. “Auto-complete With Blinds” Tool
To easily complete the assembly without having to calculate the remaining length for the blind covers, simply use the Auto-complete with blinds tool. It calculates and adjusts the lengths of the blind covers (the sections without a light source).
To use the tool, simply click Auto-complete with blinds button at the top left of the viewer.
USE EXAMPLE #1:
If your aim is to reduce to the minimum sections without lighting sources, here is the best way to proceed:
- Firstly, check the remaining length of the profile (1) in the inside the profile table.
- Then adjust the sections with Optilux and/or LED strips to distribute the unused length of the profile. To do this, click the Section settings (2) drop-down menu of section(s) that you wish to adjust and choose new values among available lengths.
- Once the leftover is distributed among the sections, click the Auto-complete with blinds (3) button.
The application will adjust the remaining unused length, dividing it evenly into blind cover sections (sections without a light source).

USE EXAMPLE #2:
If your design requires specific lengths for the blind cover(s) (sections without a lite source), here is the best way to proceed:
Click the Section settings (4) drop-down menu of the blind cover section(s) that requires a specific length. In the pop-up window, click the Lock the length (5) slider to lock this section from being adjusted.
Once you’ve locked the blind cover sections, run the Auto-complete blind (3) calculator. This function will re-distribute the length of all blind covers (sections without a light source) except the one(s) that have been locked.

1.5. POWER SUPPLY
To configurate the power supply for the profile, follow the steps below:
- Click the Calculate the required power button at the bottom left
- In the Power supply, select options in drop-down menus PSU Type and PSU Controller
- Clicking Add button, you can add one or more positions among available options


1.6. NOTES AND COMMENTS
In the text field named Note, add notes, comments, and any other additional information concerning your project.

1.7. SEND AND DOWNLOAD
Once all the previous steps are correctly completed, finalize you project by clicking the orange icon named Finish the Project at the bottom right of the screen.
It presents you with two options:
- Shop Drawing Preview – click this option if you only want to download shop drawings for your project
- Generate Project – this option allows you to receive by e-mail all the information concerning the project that you’ve customized


Generate Project
To do so, you are required to fill your information in the pop-up window and click the green Send button.
Note that sending the project to your e-mail is not a quote request. To order the profile that you have customized, contact your agent or LumenTruss directly so that a proper quote can be can be created.

Once you click the Send button, another pop-up window appears. This window contains a identification code and two download options:
- Download Project Summary – click this button to download your project summary
- Download Shop Drawing of the Project – click this button to download the shop drawing of your project

2. Create a project with “Preferred Style” tool
WHAT IS IT?
This function permits you quickly create a profile based on one of the popular styles. In just a few steps generate customizable elements. After that, customize those elements to match your project needs.

POP-UP WINDOW
- Project Name (1) : type in your project name in the text field
- Choose the Product (2) : select a profile from available options. If necessary, refer to the technical sheets on the LumenTruss website
- Choose the Style (3) :
- Option A – choose this option if you want to include more sections with LED strip sections
- Option B – choose this option if you want to include more sections with Optilux sections
- Desired Length of the Profile (4) : select from the drop-down menu desired total length
- Confirm (5) : when all fields in the pop-up window are filled, click the Confirm button
